
Building Flows
A flow is an executable diagram: nodes describe the work, edges describe what happens after each outcome, and every run of the flow follows the graph. This guide covers creating flows in the visual editor; for starting them and reading results, see running flows.
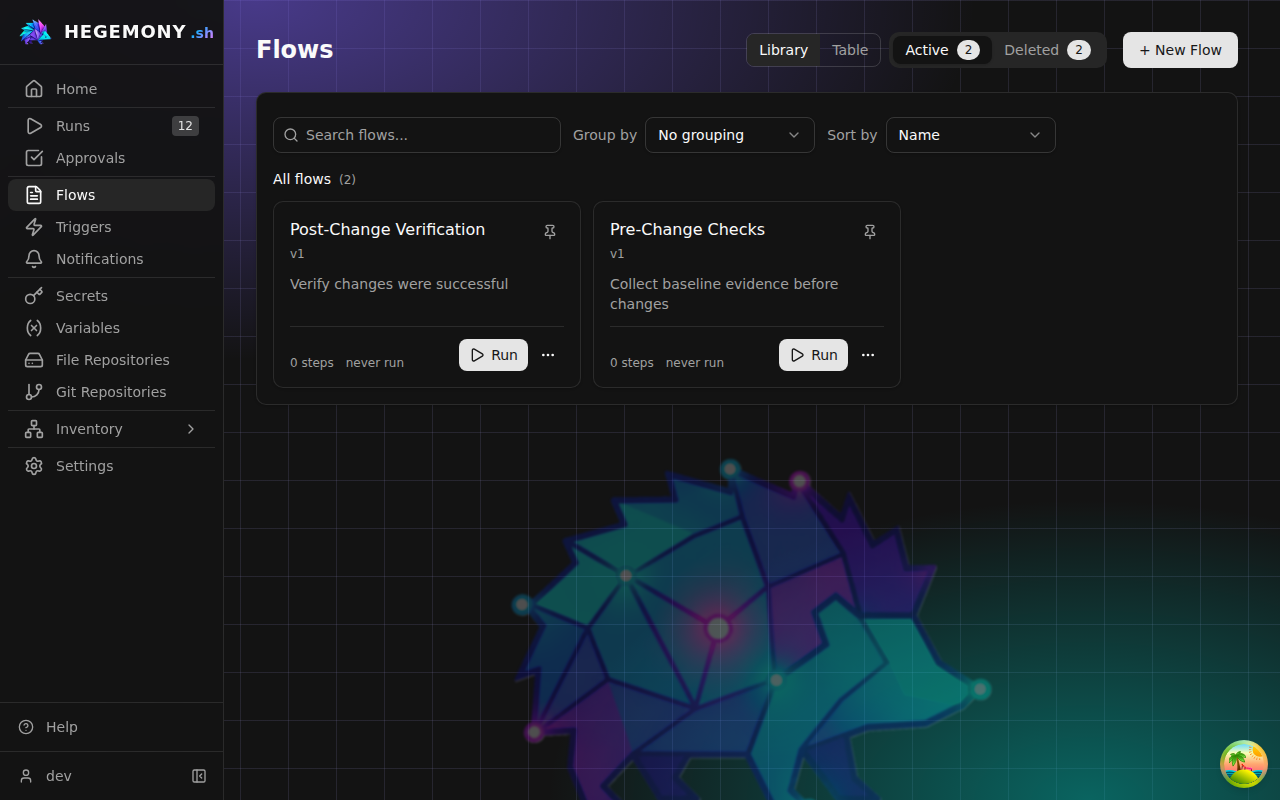
Create your first flow
Open Flows and click New Flow.
Name the flow in the header and confirm it. A suggested name is filled in for you, and naming is the first step: the flow is created there and then, which is what opens the rest of the editor. Rename it any time from the same field.
Flow names - and node names - follow the platform's object name rules: trimmed, not blank, at most 128 characters, no word longer than 64, and no control characters.
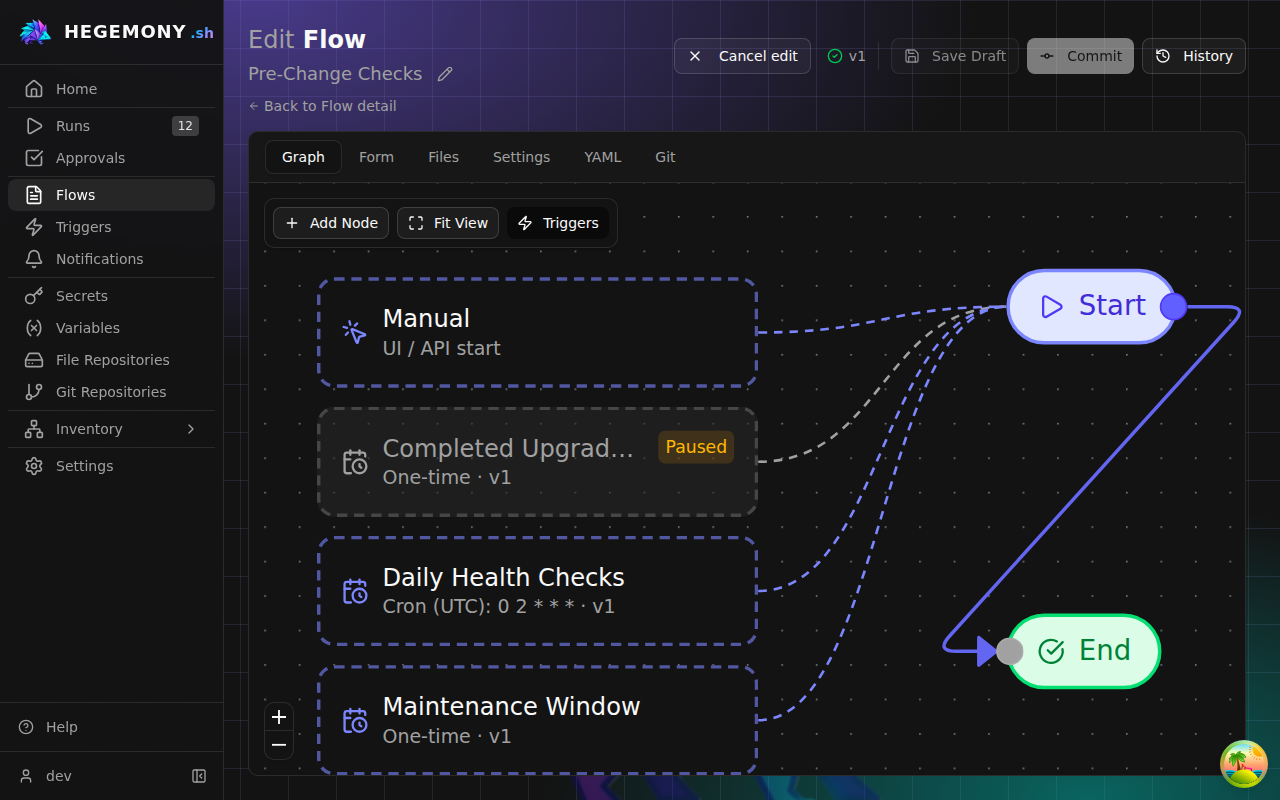
In the Graph tab, click Add Node and pick a node type; drag nodes to arrange them, and drag from a node's output handle to another node's input to wire them. Every new flow starts with a Start node and two terminals, Success and Failure.
Double-click a node to configure it.
Click Save Draft as you work, and Commit when the flow is ready to run - only committed versions can be executed.
The building blocks
| Node | What it does |
|---|---|
| Step | Runs a handler - a CLI command, an API call, a container, a check. Each step has Success and Failure outputs so you decide both paths. |
| Approval | Pauses the run until someone approves or rejects (outputs: Approved, Rejected, Expired). See approvals. |
| Pause | Waits for a person to resume the run, optionally with a timeout. |
| Branch | Routes by rules (if/elif/else) or by matching one expression's value (switch). Cases are checked in order; unmatched tokens take Else. |
| Loop | Repeats its body: while, until, a fixed count, or for-each over a list. Drop the body inside the frame and end it at the loop's end port. |
| Set Variables | Assigns run-scoped variables, readable later as {{ run.vars.NAME }}. |
| Fork / Join | Split into parallel branches and wait for all (or any) of them, with a choice of failure handling. |
| Terminal | Ends the run with Success or Failure. |
| Group | A purely visual container for tidying the canvas. |
Configure each step's Handler from the searchable catalog - what's available depends on the installed plugins (see the step handler reference). A handler whose plugin ships its own documentation page gets an Open handler documentation link in the step editor's Handler tab - it opens the page, served from the wheel installed on this instance, in the Help drawer's Installed Handlers topic, which also lists every installed handler. Steps that target devices get a Targets field listing the device roles your form defines.
Click a node to open its panel. On the flow detail page, in a version preview, and on a Git Read-only flow the panel is the editor's own, with each field shown as text instead of a control: the same tabs, the same handler settings, the same targeting, tags, timeouts and container file layout, minus any way to change them. It shows what the editor would show the same person - a handful of settings that can escape the worker sandbox stay admin-only in both. Only the edit page lets you type.
Tags
Every step takes Tags: a short list of key=value pairs you type yourself, in the same shape as device, site and flow tags. They do not steer execution on their own - ordering comes from the edges and the handler decides the work - so a tag never makes a step run, skip or run somewhere else. They annotate the step for the people reading the graph, the run timeline and the evidence list, so write the ones your team actually looks for (env=prod, team=network, risk=high) and leave the field empty when none helps. Every tag a step carries is shown on its node.
Two keys are conventional, and the editor suggests them first with their usual values:
| Key | Suggested values |
|---|---|
phase | PREPARE, IMPLEMENTATION, VERIFY, CLEANUP |
kind | CHECK, ACTION, WAIT, TRANSFER, EXECUTE |
These are suggestions, not rules: write them like any other tag - phase=VERIFY - and any value works, under those keys and under every other key. Nothing enforces them; they exist so that phase chips and evidence rows read the same across flows written by different people. In the flow itself they are ordinary entries of the step's tags map (tags: {phase: VERIFY, kind: CHECK}) - a step has no phase or kind field of its own. As you type, the field suggests keys - the conventional ones first, then every key the other steps of this flow and your organization's other flows already carry - and, once you have typed key=, the values seen under that key. So a second author reuses env instead of inventing environment, and the list refreshes each time the flow is saved.
To tag several steps at once, select them together (Ctrl-click or Cmd-click, or drag a box with Shift held) and use the small panel that appears next to Triggers in the toolbar. It also clones or deletes the whole selection. Its tag editor shows the tags every selected step shares; adding one applies it to all of them, removing one removes it from all of them, and tags that only some of the steps carry are listed underneath, untouched.
Tags are readable while a step runs, as {{ tags.env }} - and the two conventional keys the same way, as {{ tags.phase }} and {{ tags.kind }}; there is no shorter form. A tag reaches the work two ways. A step whose config or params references one resolves it into that step's input, exactly like any other template variable, so changing the tag changes what that step is handed. And the handler always receives the whole map as ctx.tags, so a handler can read a tag the author never referenced in a template. Tags are snapshotted onto the step run - so editing the flow later never rewrites what a past run recorded.
One catch: a tag reference only exists on a step that carries that tag. {{ tags.phase }}, {{ tags.kind }} and {{ tags.env }} on a step without them fail when the step runs, the same way any other unknown variable does (templates render with StrictUndefined) - so clear the tag and the reference together.
Filtering runs, flows or evidence by tag is not available yet: tags are shown wherever a step appears, but the lists do not take a tag as a filter. The run's snapshot is stored ready for it.
Calling another flow
A Run Flow step (flow.run) launches another committed flow as a child run. Pick the child from the step's Flow field and choose whether it runs the latest committed version or a pinned one, then map the parent's values onto the child's run form.
A step can name its child two ways. Picking one from the list stores its id. Bundles imported through configuration exchange instead carry the child's name, because ids are assigned per instance and would not survive the move; the name resolves to the newest matching flow each time the step runs. The editor shows either form the same way, and keeps whichever one the step already uses when you change the child flow, so an imported flow stays portable. A name matching no flow you can see is called out under the picker rather than left blank — it still resolves when the step runs, on whatever the instance holds then.
Each device-target field on the child's form gets its own row with three choices. Use child default sends the devices the child's form preselects; Map from parent target forwards the devices this run was given for one of the parent's own target fields; None sends nothing. Mapping from a parent target is unavailable while the parent flow has no target fields, and a row whose child default is empty says so — a required target with no default and no mapping fails when the step runs. Default targets travel in exported bundles as device names and are matched to devices at import, so a default naming a device the instance does not have yet arrives empty.
How a flow gets started
The Start node carries the flow's trigger nodes: a Manual card always, plus a card for each schedule and webhook pointing at this flow, and one for each parent flow whose Run Flow step launches it. They are a live overlay, not part of the definition — they never enter drafts, commits, or diffs, and acting on one (pausing a schedule, running it now, turning Manual off) takes effect without a commit. Hide them with the Triggers toggle in the editor toolbar.
Each kind is turned off in its own way: a schedule is paused and a webhook is disabled from its card here or its own page, a parent flow's call is removed by editing that parent, and the Manual card has Turn off. Turning Manual off makes the flow automation-only — only a schedule, a webhook or a parent flow can then start it. That is what a subflow wants, since its parameters come from its caller. See manual run control.
A trigger shows only on the flow version it would actually start, so a schedule pinned to an older version appears on that version's preview in History rather than on the current graph; the Manual card counts any hidden that way. Triggers themselves are managed on the Triggers page — see schedules and webhooks.
Using data in steps
Fields with the braces button accept template expressions - click it to open the Variable Picker, or type directly:
{{ inputs.NAME }}             an answer from the run form
{{ steps.NODE_ID.field }}     a previous step's output
{{ device.hostname }}         the device the step targets
{{ vars.NAME }}               a global variable
{{ secret('backend://path/key') }}   a secret
A secret a step used is replaced by [redacted] in that step's output, so a later step reading steps.NODE_ID.output never sees it; a step that needs the secret references it itself (see Secrets).
env() and file() are not available in flows: they read the platform's own environment, so only platform configuration may use them (see Secrets).
Branch conditions and loop expressions are written without {{ }} (for example steps.check.output.free_gb | int < 10) and are linted as you type. The picker's Syntax Help section carries the full cheat sheet, including filters like | default('x') and | int.
The run form (parameters and targets)
The Form tab is where you design what a person fills in when starting the run: sections, input fields, and device-target fields. Fields become the flow's parameters, and device fields become its target roles - the Settings tab lists both read-only. Use Preview to see the form as runners will. Details: flow interface builder.
Drafts, commits, and versions
Edits accumulate in a draft (the amber Draft pill) and never affect runs until you Commit, which snapshots the flow as an immutable version (v1, v2, ...). From History you can view any version, Compare two versions, Run an older version, or Restore to draft to continue from it. Revert throws the draft away and returns to the last committed state.
Files
The Files tab attaches scripts, templates, and configs to the flow - create, upload (single files or folders), organize, and download as ZIP. Container steps mount these files; their node editor shows exactly where they appear in the container filesystem.
Git sync
A flow can be linked to a Git repository (the editor's Git tab): Synced pushes each commit and pulls remote changes, Read-only only pulls - the flow then cannot be edited in the UI, though its node panels still show the settings. See the Git integration guide.
Flow settings worth knowing
- Default Step Timeout - inherited by every step unless overridden.
- Run Limits - refuse new runs beyond a concurrency cap, rate window, or cooldown. See run limits.
- Manual runs - whether a person may start the flow by hand. Turned off from the Manual trigger card, not this panel, because it takes effect without a commit. See manual run control.
- Egress Policy - the outbound-network policy enforced on the flow's steps. Every step that runs a container -
container.run,ansible.playbook,tf.plan,tf.apply- can narrow it further in its node editor; widening it needs the admin role. - Notifications - send run and approval events to configured destinations, with customizable templates. See notifications.
Finding a flow
The Flows screen searches and groups the list without leaving the page.
Search matches the flow name, its description, its tags, and its git repository and path, so "backup" finds the flow whether that word is in the name or only in the folder it is stored in. Several words all have to match.
Group by collects the rows under collapsible headings:
| Group by | Groups are |
|---|---|
| Tag: key | The values of one tag key - Tag: team puts every team=netops flow together. One entry per tag key in use. Flows without the key collect under No key tag. |
| Source | The git repository and folder a flow is stored in, then flows kept only in the database (Local), then read-only Shared templates. |
| Name prefix | The part of the name before the first / or : - name a flow network/backup config and it groups under network. Names without a separator collect under No prefix. |
| State | Draft (never committed), Uncommitted changes, and Committed. |
A grouped list shows every flow at once instead of paging, with Collapse all to fold it down to the headings.
Table or library
The Table / Library switch changes how the same filtered, grouped list is drawn.
- Library (the default) draws each flow as a card with its full description, its tags, how many schedules point at it, and how its last run went - with Run as the button on the card. Groups become shelves. A flow that has never been committed cannot run yet, so its Run button is disabled until you commit a version.
- Table is the dense view: sortable columns, per-column filters, and the row menu for edit, duplicate and delete.
Cards have no column headers to click, so the library has its own Sort by control: by Name, by Newest (when the flow was created), or by Recently updated. It orders the cards inside every shelf, the pinned one included. The table sorts by its columns instead, so it does not show this control.
Pin a flow (the pin on its card) to keep it on a Pinned shelf at the top. A pin belongs to the flow, not to your browser: everyone in the organization sees the same pinned shelf, and it follows you to another machine. It is also part of the flow's configuration, so a configuration bundle can arrive with the flows a new deployment should start from already pinned.
The deleted tab is always a table: restoring and purging is list work, not browsing.
The tab, search, grouping, sort and view you pick are all part of the address, so a filtered view can be bookmarked or pasted to a colleague. Anything left at its default is left out of the address, so a plain /flows stays plain.
Tagging flows
A flow carries tags - the same key=value map devices and sites use. Set them in the editor's Settings tab, under General, one chip per tag: team=netops, risk=high, domain=wan.
Tags are what the flow list groups by, and they are worth agreeing on as a team before spreading them: team, owner and domain cover most of what people look for. A flow can carry as many as it needs - that is the point of tags over folders, since a flow rarely belongs in exactly one place.
Three things worth knowing:
- Saving a flow replaces its whole tag set. A tag you remove in the editor is gone on save; there is no per-tag merge.
- Duplicate copies the tags too, so a fork of a shared template lands in the same grouping.
- Tags are flow metadata, not part of the versioned definition: committing a version does not snapshot them, and a git pull does not overwrite them (a pull brings the definition; your own grouping stays yours). A push does write them into the flow's file, so a repository carries them for anyone importing it fresh. The pin follows exactly the same rules.
Duplicate, delete, restore
Duplicate copies any flow (including read-only shared ones) into an editable copy and opens the editor. Deleting is soft: the flow moves to the Deleted tab for restore or permanent removal - both are blocked while schedules or webhook endpoints still reference the flow, and the error links to the offending records.